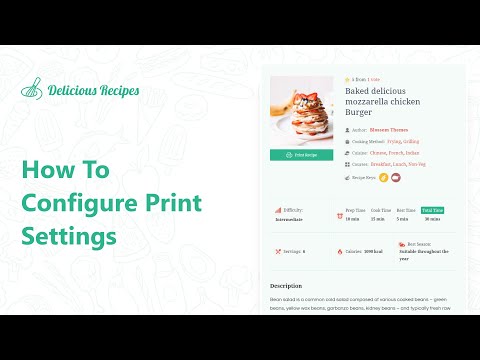
WP Delicious includes a beautiful Recipe Print Template so your readers can easily save their favorite recipes.

To customize the recipe print template, navigate to WP Delicious > Settings > Recipe Settings > Print Settings.

Print Recipe Button: Enable the toggle to allow your readers to print the recipes.
Print Recipe Button Text: You can also change the default Print Recipe text by replacing the default text in the Print Recipe Button Text field.
Preview Style: Choose whether to open the preview in the same tab or in a new tab.

Print Options Settings #
You can customize your Print template behavior from this section.

Upload Your Logo: You can upload your site logo to display at the top in the Print template. Leave it blank if you don’t want to add your logo.
Allow Readers to Customize: When this option is enable, your readers will be able to customize the Print template i.e they can disable or enable any information from your recipe.
If you disable this option, the print template will include only the information specified in Default Print Options.
Default Print Options: Here you can select the default information in the print template. If Allow Readers to Customize is enabled, your readers can easily disable/enable information as per their needs.

Embed Recipe Link: When this option is enabled, it will include the URL of your recipe.
Recipe Link Label: The default label for your recipe post link in the print template.
Display Social Sharing Info: When this option is enabled and your Social Sharing settings are configured, it will display your Social Sharing information of Instagram and Pinterest.
Embed Author Information: When this option is enabled, it will add your profile that you have configured in Author Settings.
Thank You Message: You can add a personalized Thank You Note for your readers who prints your recipes. Keep this field empty, if you don’t want to add any message.
